Introduction
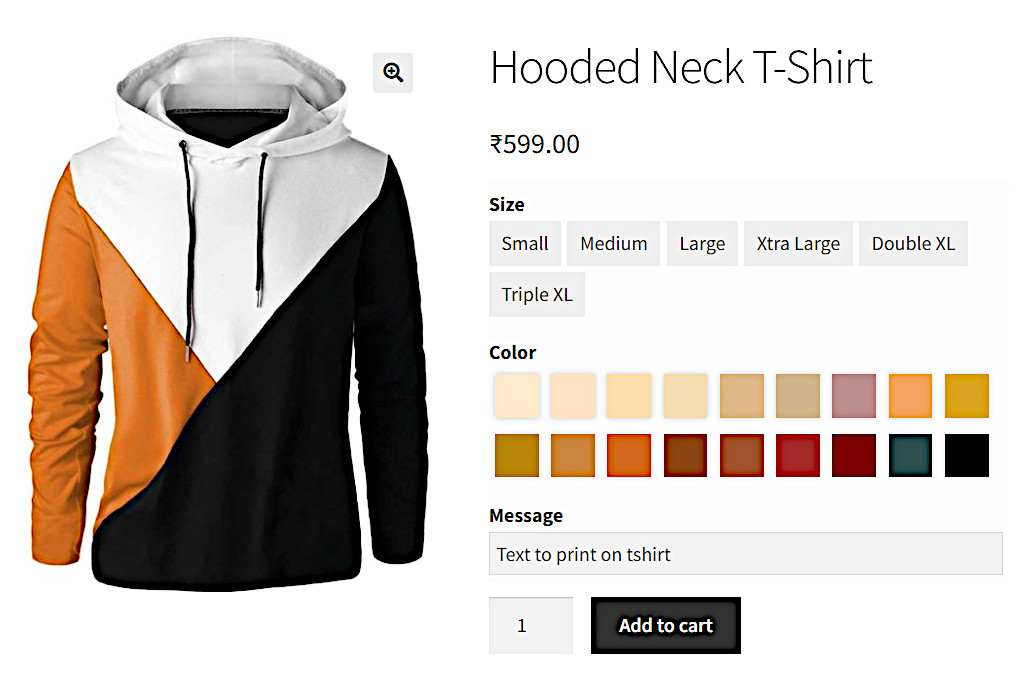
This is the core feature of the WC Fields Factory. As the name itself suggest, it lets you create and assign custom fields to woocommerce products, variations, checkout form and product admin.
The role of those custom fields would be to collect extra options from the customers when the product is being added to cart.
Those extra option captured by using the custom fields will be added as Cart Line Item Meta.
These extra options will be displayed on cart page as well. Customers can edit those extra options in cart page as well if needed.
When the customer place the order, those extra options will be added as Order Line Item Meta.
Which can viewed in admin’s order view as well as it will be included in the order related emails.
Supported Field Types
 File Upload
 Date Picker
 Color Picker
 Radio Button
 Check Box
 Select Box
 Text Box
 Text Area
 Number Field
 Email Field
 Label Field
 Hidden Field
Creating Product Fields Group
So the process starts with creating product fields group post. A product fields group can have as many fields as you need. Different product fields groups can be assigned to All Products, Individual Products, Specific Product Categories and Specific Product Types.
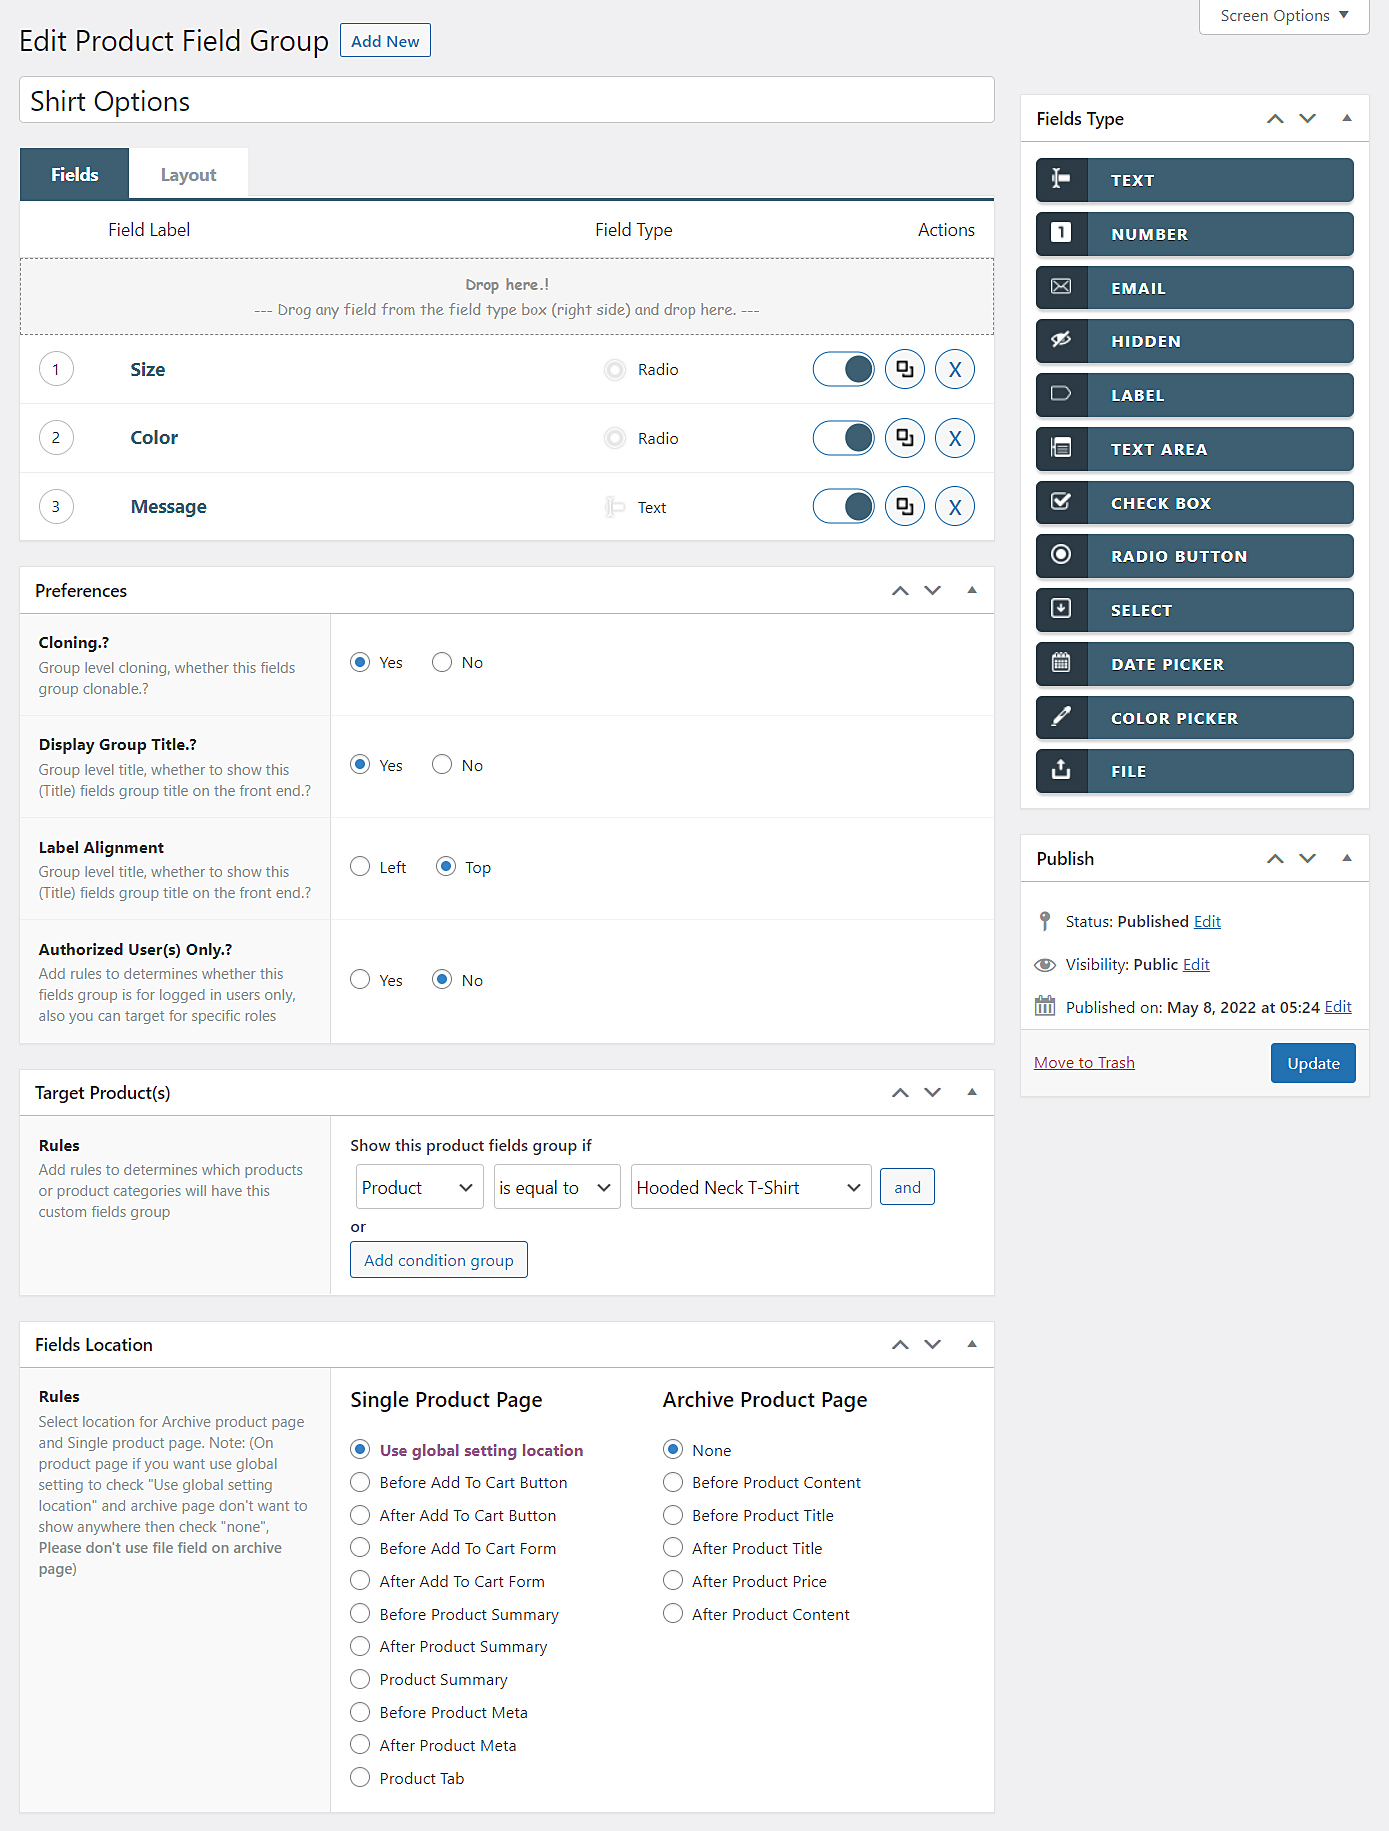
In the wp-admin, go to Fields Factory -> Product Fields in that screen click on Add New button. Now you will looking a screen like the below screen shot.
Adding fields to the Group
- Use the
Add Titletext box to give a title to the product fields group. - Now drag whatever field you need from
Fields Typewidget from top right corner and drop in to theDrop Zoneof Fields Factory View. - As soon as the field is droped inside the
Drop Zone, the field will be added to group. Now you will be shown field meta editor. Using the meta editor we can configure the field’s label, validation and various other aspects. Same way you can add as many fields as you needed.
Fields Factory View
Fields Factory View has two TABS, Fields and Layout
Layout tab used for designing the fields layout. by default fields will be displayed sequentially.
Fields tab has two parts one is Drop Zone and another is Field Lister, which list the fields that has been added.
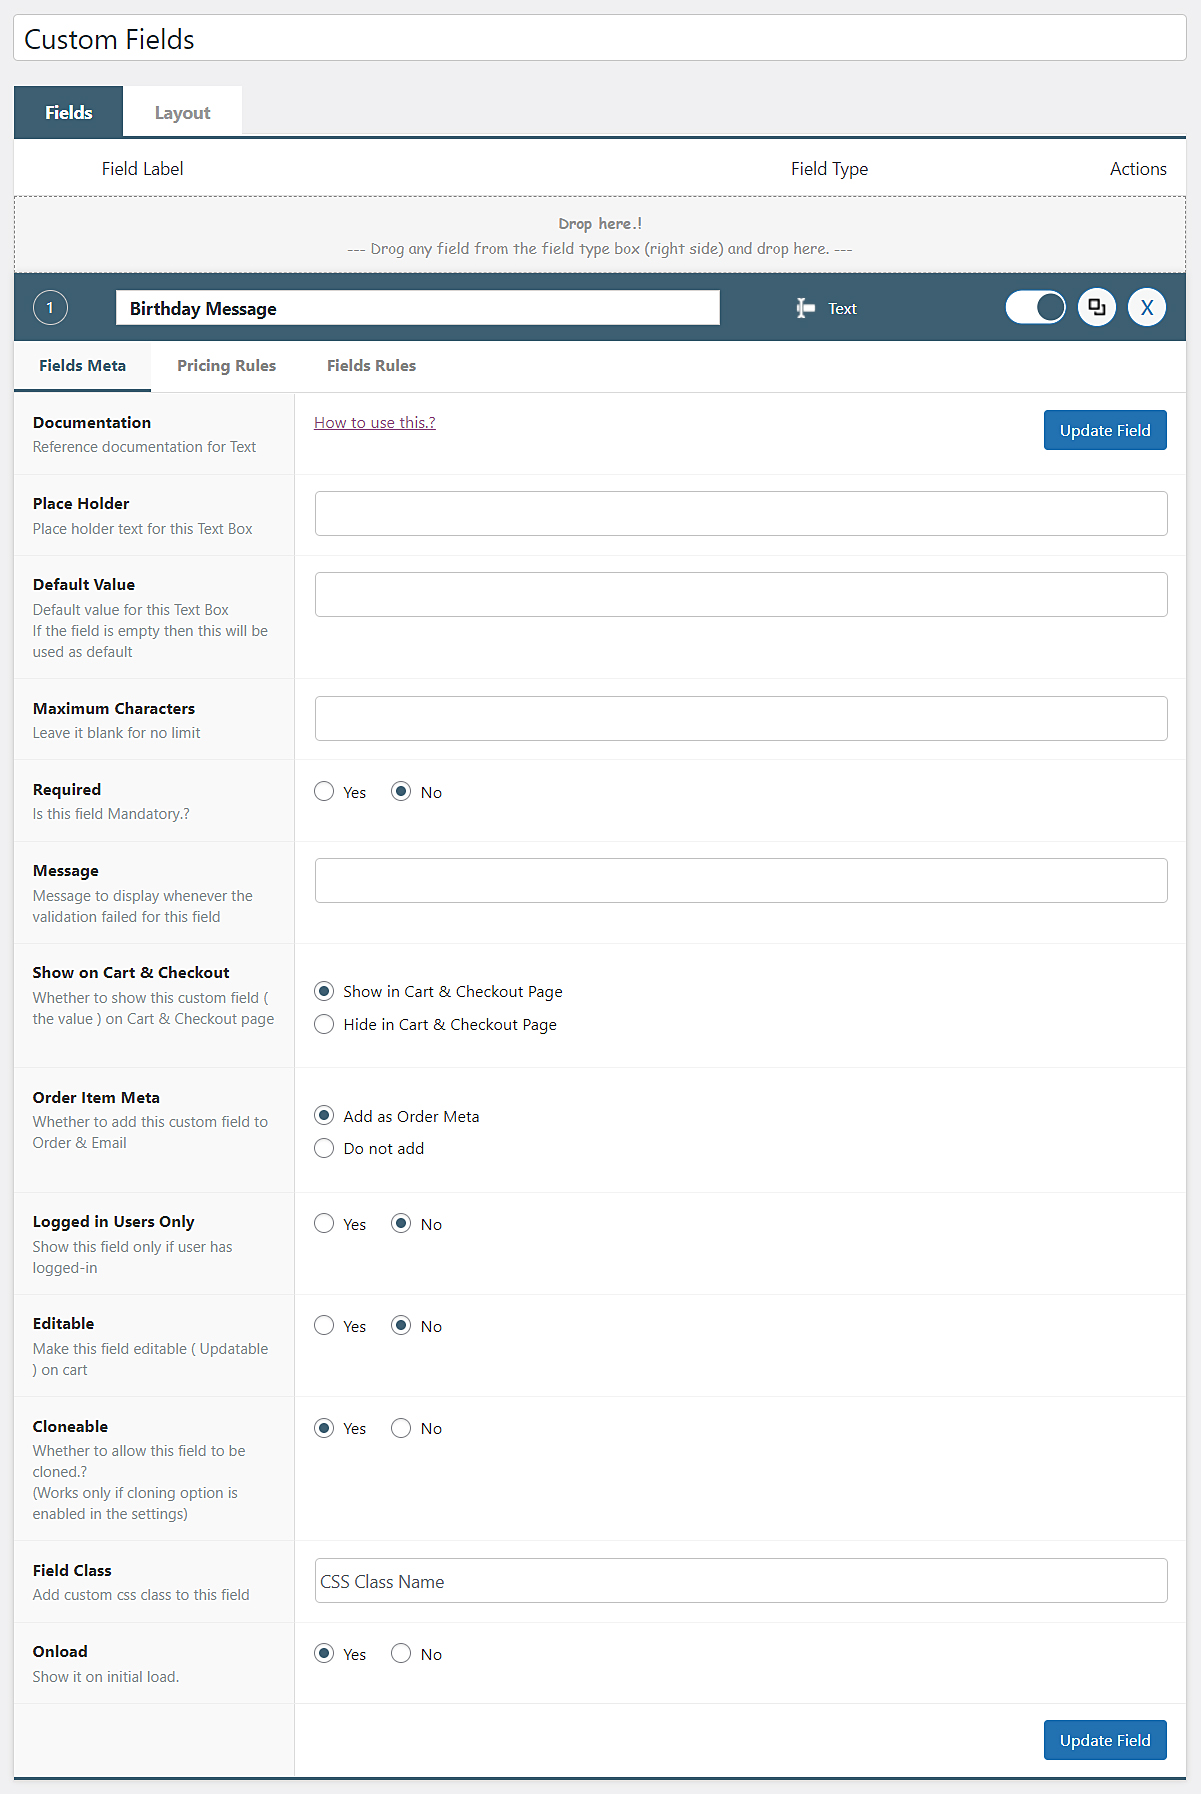
Every listed field has four parts, 1. Order Number, 2. Field Label, 3. Field Type, 4. Quick Action Buttons.
Quick action buttons allows to do the following.
- Enable/Disable allows to enable or disable the field (If the field not needed then we can disable instead of delete).
- Clone Instead of drag & drop every field, we can Clone the existing field, which will create a new field with all the properties of the field that is being Clonned.
- Delete permanently delete the Field.
In order update the fields configuration we use Fields Meta Editor. To bring the Meta Editor for any field just click on the field, you will shown the Meta Editor.
Meta Editor has three TABS, Fields Meta, Pricing Rules and Fields Rules.
Fields Meta tab is used to update fields configuration.
Pricing Rules tab is used to add rules add rules for modify product price based on this field’s value.
Fields Rules tab is used to add rules for show / hide other fields based on this field’s value.
Preferences
Group level configurations can be done by Preferences widget.
- Cloning Exclude this fields group from being clonned. It is
Yesby default. Refer this for more details about cloning. - Display Group Title Whether to show the group title on top of the fields.
- Label Alignment Whether to place the
Labelon Left side or Top side of the Field. - Authorized User(s) Only Whether to show fields only when the user is logged in.
Mapping Fields Group to Products
Once necessory fields were added, it’s time to map this fields group to woocommerce products. Using the Target Products widget. By creating one or more rules, we can assign this fields to particular products.
By default there is one rule, which maps this fields group to All Products (which can be changed). Additional rules can be created by using and & Add condition group buttons.
There are two types rules, in the case of more than one rule. either you can combine it via AND & OR logic. All these rules will be evoluated at the time of product rendering stage, when the outcome of all rules is TRUE then the fields will be embedded on the products.
- Products : Assign this fields group to either All Products or to Particular Products
- Product Category : Assign this fields group to either All Categories or to Particular Categories
- Product Tag : Assign this fields group to either All Tags or to Particular Tags
- Product Type : Assign this fields group to either All Products Types or to Particular Product Types
- Product Variation : Assign this fields group to either All Products Variations or to Particular Product Variations.
Fields Location
The Fields Location widget is responsible for where this group will be placed.
It allows you to choose appropriate WooCommerce template actions for both Single as well as Archive Page.
By default it will be using the location from Global Fields Factory Settings. Here you have chance to ovrride it.